 |
| Above: The loom with the warp ready. From the from (left) the strands will be straight up and down. From the back (right) the will be on a slight angle. |
 |
| Above: Starting the weaving weft using the tapestry needle thread with my chosen yarn. |
 |
| Above: Creating rya knots out of the tassel strands |
There is so much you can make with my little mini weaving loom, you're not really going to know what to do with it once you get one. Following a feature on Etsy, I've sent masses of them all over the world. So for all the new customers and my old customers who have one stashed one away for a rainy crafternoon, here are some ideas on how to use it.
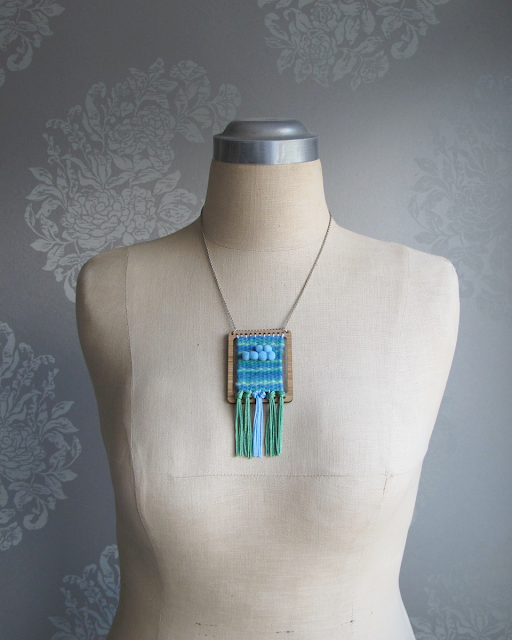
Simply put, you can use the mini loom to make a necklace pendant and you can also use it to make mini weavings. You can wear the loom itself on a necklace, or the weavings themselves as necklace pendants.
Now you can wear your love of weaving with pride or churn out the cutest gifts for your loved ones.
You will need:
- a mini loom (available from my Etsy shop)
- cotton yarn for threading the loom warp (regular sewing thread is not great because it stretches)
- wool or acrylic yarn for the weft (I used ombre Veronica yarn from Lincraft)
- embroidery scissors
- large tapestry needle (I didn't use the little shuttle that comes with the loom to make this weaving)
- regular sewing needle and thread
- mini pom poms (I used Birch Craft 7mm size in blue)
- tassels (I used Sullivans 50mm rayon tassels in emerald and blue)
- 2 jump rings (I used 5mm size)
- a needle threader
- Cut about 1.2m of cotton yarn for the warp. This goes up and down between the holes in the loom. Thread the loom up and down through the holes with the cotton yarn to create the warp. You have to knot it first at the corner where you start and knot it again at the corner where you finish. The strands will be vertical on the loom front and slightly slanted on the loom back. Make sure the yarn is taut but not very tight before you knot it off. Make sure you use the loom the right way up with the hanging holes at the top. You can add jump rings later if you want to make a pendant.
- Cut about 2m of your chosen weft yarn. Using the tapestry needle threaded with the yarn, move it across the warp going under and over and under and over. Then when you get to the end, go back the other way going over and under and over and under. I started at the top as I knew I wanted to add some embellishment at the bottom but did not know yet what it would be. Typically you would weave from the bottom up. Use a pin to push the layers you are creating close together.
- When you finish the weft you need to tuck the loose threads into the back of the weaving. This can be fiddly. I only used one ombre thread through my weft so I created colour variation without having to change thread colours throughout.
- You can create rya knots (a knotted tassel feature) anywhere as you go. I added them at the bottom after the last row. To create my rya I cut apart a tassel and pulled out three even strands. I threaded them behind two warp strands using a needle threader. Using a pin pull the middle through as a short loop. Finally, take the loose ends on either side of the loop and bring them up, into the loop and pull down. You can trim them like a hair cut when the weaving is finished
- I also used mini pom-poms to create chunky embellishments. You can sew these in as you go but I just used a regular needle and thread to sew them on after the weaving was finished. I'm still learning about weaving so I'm not a purist yet!
- If you want to make it into a pendant at this stage, just add the two jump rings and thread onto an existing necklace chain.
- Removing your weaving from the mini loom can be tricky. Cut the warp across the back and carefully pull it through the holes and off the loom. Lie it flat and you will see it has strands going out the top and the bottom. You have to knot them together as pairs of strands. Do this across the top and across the bottom. They can then be tucked into the back of the weaving with a pin.
- You can then cut a wood skewer to size and stitch it through the knotted warp strands and over the skewer for an authentic hanging weaving look. Or you can use the warp yarn or regular thread to create a simple thread hanger from the top corners of the weaving, as I did.
- It can be fiddly, but creating a mini weaving is addictive. Best of all you can make a couple a day and try out all your weaving ideas.
Now head over to the mini weaving loom tutorial Part 2: Removing your weaving from the loom.


No comments
Post a Comment