For the longest time, I've been wanting to write a tutorial about how to use my little timber wonder frames. I decided I would take it to the next level and make a necklace using them.
For this project you will need:
- Things to put in your frame. For example, photos, kids paintings, wrapping paper, magazine tear-outs, fabric, mini embroideries, tin foil, gold cardboard, plastic. You can pretty much use anything as long as it is flat. I even used offcuts from some glitter plastic table covering material. The thinner the material the better.
- Things to embellish the outside of your frames with such as mini pom-poms, flat beads, mini brads, adhesive gems (I used Strip Blings and Pearl String by Paper Xtra), Cloud9 Design Rain Dots. I found a lot of these items in the craft and scrap booking section of Lincraft.
- Jewellery making hardware and tools. I used 2 packs of 35mm Eye Pins and 1 pack of 10mm Jump Rings both in boho gold. You also need round-nosed pliers.
- I also used hand-made glass Venetian beads my sister gifted to me, some blue and white Asian beads from a broken necklace and a couple of old single earrings I found in my craft supplies to add texture to the necklace.
- Craft glue, fabric scissors, paper scissors, needle and thread.
- Finally, some lovely thick satin ribbon as a tie feature to fasten the necklace.
STEP ONE (above)
Decorate the front part of your wonder frames with adhesive pearls, rain dots and blings. Glue on beads and mini pom-poms.
STEP TWO (below)
Decide what material you will match to each frame. You can play around with this and come and go until you are happy with the variety and contrasts. It's a nice phase.
STEP THREE (above)
Frame your materials. Wonder frames work like a sandwich where the two parts of the frame are the bread and your chosen material the filling.
You can either use a pencil to trace around the frame onto the material as I did above and cut just inside the line before gluing it onto the frame back OR you can glue the material on the frame back and trim the overhand off. I recommend the latter when using fabric. Also, if you are glueing thin fabric on, only apply glue around the edge of the frame back, or it will smoosh through and ruin your embroidery.
STEP FOUR (above)
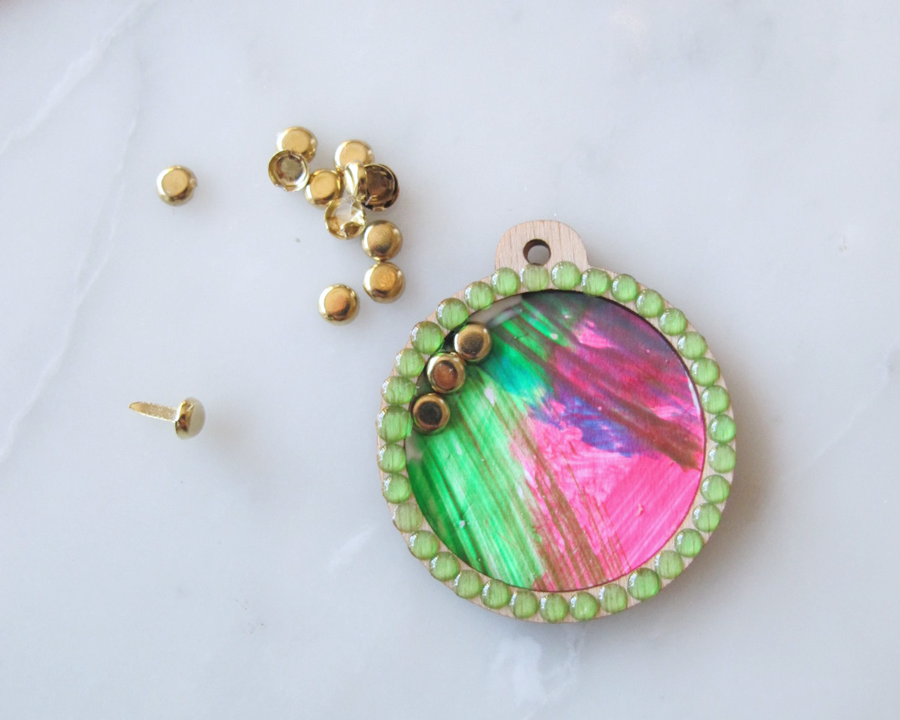
You might like to add even more embellishments once you have framed your material. I broke the backs off the mini brads and used them as studs. I also used crystals and the bottom halves of the random earrings I found which I attached using the jump rings. The jump rings are easily bent open using the pliers. Here is a great tutorial on how to open jump rings. Leave the jump rings open at this stage.
STEP FIVE (above)
Decide the configuration of your necklace and where you want the frame pendants to sit. Lay the finished frames out flat and space them using the eye pins. My necklace configuration changed between this and the latter steps. This is because once I started linking them up gravity had other ideas about how they would sit. This is part of the creative problem solving process that I love so much about making.
If you want to add something like the Venetian beads onto the eye pins, this is the time to do it, before you join them up.
STEP SIX (below)
Using the round nosed pliers, make a half loop on the straight end of the eye pins. Then once you have hooked them through the neighbouring eye pin loop you can close them up. As you slowly build up your necklace, keep lifting it into the air to make sure that the frame pendants are sitting as you wanted them too. Sometimes you will want the loop on one end of the eye pin to be a mirror image of its other end. Sometimes you will want it to be rolled at a different angle. These small changes will make the corresponding parts of the necklace fall in the right directions.
STEP SEVEN (below)
Once you have finished joining your eye pins, hook the frame pendants and their jump rings through where you want them to sit and close up the jump rings with the pliers.
STEP EIGHT (below)
The last step is to add the ribbon tie feature. Measure your ribbon around your neck or a dress-making doll yourself leaving some length for a bow and tails. You need two pieces of ribbon of equal length. Place the end of the ribbon flat and fold up the raw edge about 5mm. Then fold the edges in to make two triangles shapes. This will create a tapered end on the ribbon so you can join it to the last eye pin loops either side of the necklace. Hand stitch the folds you made and then also whipstitch a few times through the last eye pin loop. Repeat for the other end of the necklace.
STEP NINE (below)
Try on your necklace and check the bow at the back. Trim the tails so they are even and neat. You can still make changes to your necklace at this stage. Especially if you are not happy with the way the frame pendants are hanging. The eye pins can be re-bent a couple of times before they become unusable.
Admire it. It's art, right?


No comments
Post a Comment